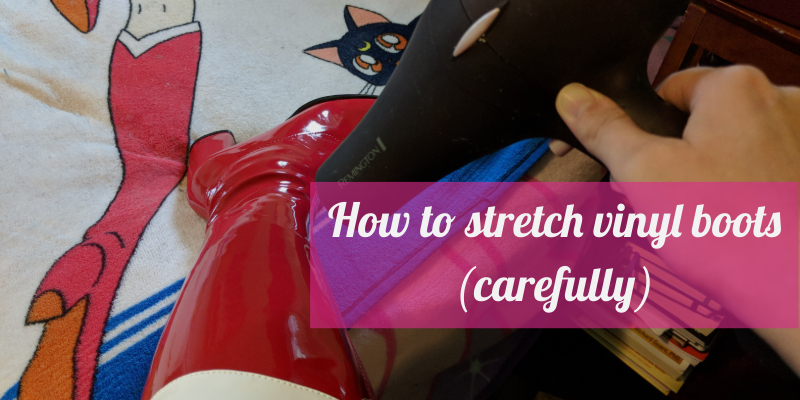
How to stretch vinyl boots (carefully)

A couple of weeks ago, I rambled about how I was so incredibly excited that I was finally going to have a pair of Sailor Moon boots to call my own.  The boots showed up on Monday, and I excitedly went to try them on, only to find out…

…that my calves were a little too muscular for these boots.  Curse you, muscular calves! (Well, not really, I like my calves.)

I ended up messaging the seller (Catzia) telling her the boots didn’t fit my calves, and I asked if I could exchange them for a larger size in hopes that they might fit my legs better.  She said she’d be happy to exchange them, but before doing that, I should try to stretch the boots out using a hair dryer to see if I could get them stretched out enough to fit. And it worked!  They were snug, but I could zip them up all the way!

While I was waiting to hear back from Catzia, I found a number of “how to stretch shoes” tutorials out there. When I came across the hair dryer method, I figured it’d work for the boots (but didn’t want to try it until I’d heard back from Catzia) – but most of these methods focused on making the foot area of a shoe wider, not necessarily the calves.  And they all focused on leather shoes, and not vinyl boots.

Enter The Crafty Nerd, armed with a hair dryer and a pair of epic Sailor Moon boots.

Continue reading →

Five awesome nerdy DIY projects

Stuck home on a rainy weekend with nothing to do?  Looking for something fun to make for your home office or living room?  Check out this roundup of five awesome nerdy do-it-yourself projects to help make your home a little extra nerdy.

DIY D20 Lamp from Our Nerdy Home


This incredibly easy IKEA lamp hack would make an awesome addition to your office, game room, or anyplace else that needs a little extra light.  And with the materials costing less than $25, this is a relatively inexpensive project!  (Which is always good, so you can save some money for more games, right?)  🙂

Don’t Panic Towel Messenger Bag from Nerd By Night

Alright, this is something I’m probably going to have to make for hauling around Gen Con goodies.  I think this is quite possibly the nerdiest bag I’ve ever seen – and I need it in my life.  I mean, come on, a Hitchhiker’s Guide to the Galaxy themed bagmade from a towel.  And for the cost of a towel, you can be a hoopy frood with a towel bag of your very own.

Light Up and Talking PotatOS from Portal 2, by codename-3c

Looking for something a little more complicated to make?  Why not try your hand at this talking PotatOS from Portal 2?  (Note: there are spoilers for Portal 2 in the instructions for this project, so keep that in mind if you haven’t played it yet!)  I’m half tempted to try making this for Ross.

Geek Welcome Mats from Our Nerd Home

Our Nerd Home has a lot of awesome DIY projects on their site – and this is another awesome project of theirs!  These geeky welcome mats look relatively simple to make, and you could easily do all sorts of designs with this technique!  (I’m imagining Rainbow Dash’s cutie mark as one idea for a welcome mat…)

DIY Comic Book Lamp from A Girl and A Glue Gun


I like this comic book lamp project. It looks like it’d be a lot of fun to do with not just old comic books, but all sorts of nerdy artwork – and you could easily just make a new lampshade for an existing lamp, or snag a lamp from a thrift store that needs a little bit of TLC!

Hopefully these five project ideas might spark your DIY side and give you some ideas for fun stuff to make the next time you’re bored and looking for something creative to do!  I know I’ve got some ideas, that’s for sure.

Triangle Shawl Pattern (based on the ever-popular Corner to Corner blanket)

A friend of mine (hi Ellie!) just got started crocheting, and asked me for a shawl pattern that was relatively simple for a beginner.  I’ve been cranking out Corner to Corner blankets like nobody’s business for the past couple of months, and Ellie and I both figure that half of a Corner to Corner blanket would make a pretty awesome shawl.  However, the pattern for the Corner to Corner blanket is written rather complicatedly, despite it being a simple pattern to work. So, here comes The Crafty Nerd’s first ever crochet pattern – even if it’s just a simplified writing of an existing pattern!  And, of course, I’m including pictures.

To start:

  • Chain six.
  • In the fourth chain away from the hook, make one double crochet.
  • Double crochet in remaining two chains.  You will have a little square at this point.
20151215_173618

Gah, my crocheting task lamp is way too bright for the whites in this yarn

First row:

  • ​​chain six, turn the work over to start the next row
  • in the fourth chain from hook, make one double crochet
  • double crochet in remaining two chains – this will result in two squares next to each other. We’ll be joining these two squares together with a slip stitch in the next step.

    20151215_173756

    Two awkward little squares

  • In the chain space at the end of the first row, make a slip stitch, and then make a chain of three.  It’ll look like the following picture:

    20151215_173817

    Squares, joined!

  • In the chain space, make three double crochets.  You’ll end up with something that looks like a little heart.  That’s it for this row!
20151215_173840

Our first full row!

All the rest of the rows:

  1. Chain six, turn the work over to start the next row.
  2. In the fourth chain from the hook, make a double crochet.
  3. Double crochet in remaining two chains.

    Here’s the steps you’ll repeat until you get to the end of the row.

  4. In 3-chain space, make one slip stitch, then make a chain of three.
  5. In the same 3-chain space, make three double crochets.
  6. Move to the next 3-chain space, start from step 4 again.
  7. Repeat until the end of the row.  Once you get to the end of the row, start from step 1 in this section.

Here’s what you’ll come up with after one repeat…

20151215_174825

…and after lots and lots and lots of repeats.  (Granted, this is an entirely different project, but still the same corner-to-corner pattern!)

20151215_174900

Once you get to the desired size, just fasten off your last stitch and you’re done!

If you learn better by watching, check out this video by Stitchinstacy on YouTube!  She walks you through the process of doing the corner-to-corner stitch, but in more detail than the pictures I’ve got here.

If you work through this pattern and have questions, let me know in the comments!  Or if there’s something that needs better explanation, let me know.  I’ll happily rework this until it’s easy enough to understand for crocheters of all ages!  (And if anyone wants me to break down the other half the blanket pattern… let me know!)

Fixing up a Comm Badge, the Crafty Nerd way

Earlier this week, I was wracking my brain, trying to find a good idea for a blog post.  Should I write about yarn?  Nah, too boring.  Should I show off the blanket I just finished?  Eh, also boring.  It wasn’t until yesterday evening, when I was working on patching up a piece of a costume I’d ordered, when the idea flopped into my lap, almost literally.

IMG_20150918_192630

I’d ordered a Star Trek: The Next Generation costume off Amazon (my costume crafting skills aren’t quite up to making Starfleet uniforms yet, sadly), and while the costume itself fit, and the rank pips were beautiful, the comm badge was… less than stellar.  Granted, the picture above is after I’d started sanding it, but there were large chunks of paint that had flaked off and stuck to the costume package, which left a lot of big black spots where you can see the plastic.  Being the crafty nerd that I am, I didn’t let the sorry state of the comm badge get me down.  Instead, I grabbed some of my mini painting tools and set to work!

IMG_20150918_193921

After sanding the loose paint off the badge, I took it outside and sprayed it with primer – the good stuff I use for my minis is possibly packed in a box somewhere, but I did manage to find some other primer in the garage, so I worked with what I could find.

IMG_20150919_065914

Post-primer, it already looked lots better than it had when I’d gotten it, haha.  I let it dry overnight, and then before my workshop this morning, I broke out the paints!

IMG_20150919_070825

The paints I have are old, and a little lumpy, but they worked for what I needed them for.  (I need to get a new set of paints one of these days…)  I worked with some Chainmail Silver and Glorious Gold paints from my mini painting stash, and managed to get the badge all painted before I got to work!  I primed it after I got home, and the results were pretty good.

IMG_20150919_110054

It’s not super glossy like the replica Starfleet communication badges you can get from places like ThinkGeek, but considering the whole costume cost $35, my paint job got the job done.  Ross has a comm badge lurking around somewhere, and if he can’t find it, I may splurge and get one of the fancy Voyager ones, even though it doesn’t match the TNG era uniform, since the main reason I got the costume is so I could dress up as my favorite captain…

tumblr_inline_ntnumsJY3r1qa04wd_540

Okay, so it’s a dress uniform, but close enough, right?

Granted, it’ll be Janeway in a TNG era uniform, but in order to get a proper Voyager uniform made for me, I’ve gotta spend $80 to order it from FanPlusFriend, the place I used to get my frilly Japanese gothic lolita clothes from, and I wanted something quick for Halloween.  However, if I do end up going to Starbase Indy, I might splurge and get the more show accurate costume…  Once I get some pictures of me in my costume (I’ve got to get my hair cut and freshly dyed first!), I’ll happily share them here! 😀

My Little Pony Build-a-Bear: When Good Manes Go Bad (or: how to fix a terribly messed up mane)

The original My Little Pony Build-a-Bear mane styling post is actually one of the most popular posts on my website, and because of that, I’ve had a number of people asking what to do if their pony’s mane is so horribly tangled that the only option seems to be to give said pony a little haircut.  Well, before you go that route, take a look at this little tutorial on how to fix up an extremely messed up mane.

Oh, Scootaloo... Too many snuggles, eh?

Oh, Scootaloo… Too many snuggles, eh?

Continue reading →

Cutie Mark T-shirts: make your own!

Have you ever wanted your own t-shirt with your favorite My Little Pony’s cutie mark on it?  (Or a t-shirt with a simple cartoon symbol, like Super Mario’s 1-Up mushroom or other relatively low-detail images)  Well, here’s a tutorial for you – and all you need to know how to do is operate an iron!

IMG_20140530_111202

Materials needed:

  • A printout of the cutie mark (or image) you want to use
  • A pen or marker
  • Fabric in each color used in the cutie mark
  • Heat ‘n Bond
  • A pair of scissors
  • A t-shirt
IMG_20140530_111230

Step one: time to put those scissors to work.

The first thing you’ll want to do is cut out pieces of fabric a little larger than each different area of color in your image.  I ended up with four pieces of fabric – blue, red, yellow, and white.  While you’re working with the scissors, you’ll also want to cut apart your image – I cut mine into different sections based on the colors in Rainbow Dash’s cutie mark, and ended up with a cloud and three little lightning bolts. You’ll also want to get out your Heat ‘n Bond, too – and cut out pieces that are slightly smaller than the pieces of fabric you’re using.

Step 2: Get out the iron!

Step two: Get out the iron!

Next, it’s time for the iron.  Lay out your piece of fabric, then lay the Heat ‘n Bond, paper side up, onto your fabric and follow the instructions on the package to iron your Heat ‘n Bond to your fabric.

Step four: tracing our pieces!

Step three: tracing our pieces!

The next thing we’ll do is get out our marker and trace our cutie mark pieces onto the Heat ‘n Bond paper.

Step four: cutting out the fabric shapes.

Step four: cutting out the fabric shapes.

The next step has us cutting out the fabric shapes.  It’s also not a bad idea to re-assemble the shape to make sure everything fits together – if not, you can trim things a little bit to make them fit.

Step five: lay out your design, and iron away!

Step five: lay out your design, and iron away!

This is where the fun stuff happens.  Peel off the paper backing from your pieces of cutie mark, and lay out the pieces on your t-shirt where you want them to end up when you’re finished.  Iron them onto your t-shirt according to the directions on the Heat ‘n Bond package – you may want to pay special attention to pointy ends that might come up if not properly adhered to your shirt.

IMG_20140530_203152

Step six: wear your t-shirt!

Once your shirt’s cooled off a bit, and you’re sure everything’s securely ironed onto your t-shirt, now you can wear it!

This is a pretty fun way to make a unique looking t-shirt – I’ve worn my Pinkie Pie t-shirt to conventions and received lots of compliments on it, and some people even thought it was screen printed – when I told them I did it with fabric and Heat ‘n Bond, they were amazed!  And as I said earlier, you can do this with any sort of simple graphic that doesn’t have a lot of detail to it.  If you follow these steps to make a t-shirt, show me the results!

Edit 10/30/14: Thelma followed my tutorial to make a Rainbow Dash shirt for her daughter (and she also made some very cute wings and ears, too)!  I’ve got her pictures below – the shirt turned out awesome, I love it! 🙂

photo 1 photo 2

Beth’s Random Craft Picks – 5/7/14

It’s been a while since I’ve done a craft roundup, and I’ve missed scouring the internet for cool craft project inspiration!  So, without further ado, here are five awesome craft projects to add to your to-do list!

Minecraft Creeper Afghan

Photo of an afghan made to look like a Creeper from Minecraft.

*hissssss-BOOM*

For those of you who love Minecraft (much like myself), or know someone who does, here’s a treat for you!  This Creeper afghan looks pretty simple to put together, and would look cool in a geeky guest room or would make a great gift for someone who’s super obsessed with Minecraft!  You can find the pattern here.

Charmander Amigurumi Plush

So adorable!

So adorable!

Here’s a cute little Charmander amigurumi plush that looks like it would crochet up pretty quickly – I love his happy little smile!  I might add this little guy to my to-do pile, myself…  The pattern for Charmander is on Ravelry, right here.

Nintendo Controller Purse

Nothing says awesome like a Nintendo controller purse.

Next up is a Nintendo controller purse!  I’ve never seen anything like it – and it looks like it’d be fun to put together, too.  You could probably up the size of the pattern and make a large book tote, too.  Find the pattern here!

Nintendo Controller Wallet

This is a perfect way to breathe some new life into a dead Nintendo controller...

This is a perfect way to breathe some new life into a dead Nintendo controller…

And how about a wallet to go with the purse?  This looks like the best use ever for a dead NES controller – and could be a fun afternoon project for a rainy day.  The tutorial for making a controller-wallet of your own is here.

Fifteen Doctor Who Cross-stitch Projects!

*vworp vworp*

*vworp vworp*

This isn’t just one project, but a list of fifteen!  Find some inspiration for your next cross-stitch project here.

Hope this gives you guys some inspiration for your own craft projects, or gives you some cool ideas of things to try!  😀

How To Detangle Build-a-Bear My Little Pony Manes

Edit 7/2/14: I’ve had a couple requests for help when it comes to terribly tangled manes – and now I have a tutorial for that!  You can find it here!

With the very recent release of Princess Twilight Sparkle at Build-a-Bear, and my very very recent (as in, this afternoon) purchase of Twilight Sparkle and her buddy Spike, I figured I may as well get all three of my Build-a-Bear ponies together for a picture – they’re some of the nicest quality ponies I’ve got in my collection, and I do love taking pictures of my ponies!  However, when I took Pinkie Pie and Rainbow Dash off the bed in my office, I noticed their manes were a little less than perfect looking… Pinkie had a few knots in her mane, and Dashie had some flyaways and looked a little messy.  I figured it might be a good idea to brush and detangle their manes – and then got the bright idea to post a photo-laden tutorial of the process here!  (Granted, this idea hit me halfway through Pinkie Pie, but still…)

So, without further ado…

How to Detangle Pony Manes

First things first, you’ll want to pick up a wig brush (or at least a brush with metal bristles) and some wig detangler.  I use an old American Girl doll hairbrush, and recently picked up some Brandywine Wig Detangler off of Amazon for detangling the wig that goes with my Pinkie Pie costume.

2013-08-03 13.59.36

Wig brush and detangler!

Have a look at Pinkie’s mane – I’ve brushed it a small amount at this point, but you can see it’s still kinda messy – even for Pinkie!

2013-08-03 13.59.16

Pinkie after a little bit of detangling – but not much.

Continue reading →

Quick afternoon project: No-sew fleece blanket!

I will admit – one of my favorite simple crafts to do that involves very little effort is making no-sew fleece blankets.  Just about anyone can do them, even kids, and you can make them any size, with any fun fleece you can find, and they don’t take terribly long at all to make.  You can get no-sew fleece blanket kits at Jo-Ann Fabrics (or probably many other places, I’ve only seen them at Jo-Ann’s) – or you can make something a little more personal and do it all yourself!  If you take the do-it-yourself route, you can even pick the size of your blanket, and make it as big or as small as you want.  I’m sure there are already lots of no-sew fleece blanket tutorials out there, but maybe someone out there will find this helpful, and I’m hoping you’ll all enjoy my tutorial!

As you might remember from my Startitis post, I have some My Little Pony fleece that’s been waiting for this project.  My blanket is going to be big enough to cover the bed in my craft room/home office – this way, I can wrap myself in pony goodness if I need to, and I can use it to cover the bed as well!  That’s my main reason for doing this – considering nerdy comforters are nearly impossible to find, I may as well make my own.  I should have bought that Sailor Moon comforter off eBay ages ago when I saw it for $40…

What you’ll need

  • two pieces of fleece, as much as you’ll need for the desired size of your blanket (I purchased two yards of each)
  • scissors, sharp ones preferably
  • pins – these are optional, but they’ll help keep the two layers of your blanket together
All trimmed and ready to cut.

All trimmed and ready to cut.

Anyhow!  Step one is to cut your blanket down to the size you need.  I tend to wing it with stuff like this, instead of measuring it, but the standard size for a twin sized blanket is 66 in by 90 in (and I found this information here, for those curious!).  I picked up two yards of each of my fleeces, so I only needed to trim the edge of the pony fleece so the two pieces of fabric are roughly the same size.

Step 2

Step two is optional – while fleece tends to stick to itself pretty well, you might want to pin the two layers of fleece together just for an extra bit of security – this will make sure the two pieces don’t shift while you’re flipping it around as you cut and knot the blanket.  Don’t pin too closely to the edge – you want to leave enough room to cut the fringe around the edges! 🙂

Step 3.1

Step three: cut the fringe!  This is where the sharp scissors will come in especially handy.  You’ll want to make your fringes 5 inches long, and about an inch and a half wide – this way you’ll have enough fabric to tie in knots and have a fringe that’s not too stubby or too long.  However, also keep in mind that fringe-making is not an exact science – they won’t all be perfect, and that’s alright.  It won’t be noticeable when you’re all done!

When you get to the corners, just cut the corners right out – it’ll leave you with a couple of nice 5-inch squares of fabric.  (Which you could maybe use to make a matching pillow!)  If your scissors are really sharp, you might be able to cut through multiple layers at once – that’s what I did in order to cut doww on my cutting time, haha.

Step 4

Step four is the long part.  Now you have to knot all these fringes.  This is where you might want to put on a good tv show or movie and zone out while you knot away – my show of choice was Lost.  The total time it took me to knot this thing was about an hour – it may take more if you’re working on a larger blanket.

2013-02-24 14.37.30


And now we’re done!  This took a total of maybe an hour and a half to two hours from start to finish – it’s a perfect project for a lazy Sunday afternoon, or for a quick gift for someone!  And if you can find the right fabric, it can be delightfully nerdy as well.